4 Quick Steps To Set Up SharePoint For Project Management
Does your organization manage projects? Does your organization have SharePoint? If you answered yes to those questions, then read on!
SharePoint is an amazing tool for team collaboration. With its team sites, robust document management capabilities, and out-of-the-box integration with Microsoft Project, it is the perfect platform on which to build out a project and portfolio management solution.
With a few simple configurations to your SharePoint environment, you can set it up to mimic the structure required to manage projects of all sizes and type.
For the rest of this article, I’ll cover four steps you can take to set up your SharePoint site to manage a project.
- Use the Quick Launch to manage the project management process
- Manage tasks with work management lists and dashboards
- Create Project Status Reports
- Use the Microsoft Project to SharePoint sync.
One of my favourite features in SharePoint is the ability to save sites as templates, that can be re-used again and again. So we’ll also cover how and why saving project sites as SharePoint templates is a very practical approach to improving project management in your organization.
1. Use the Quick Launch to manage the project management process
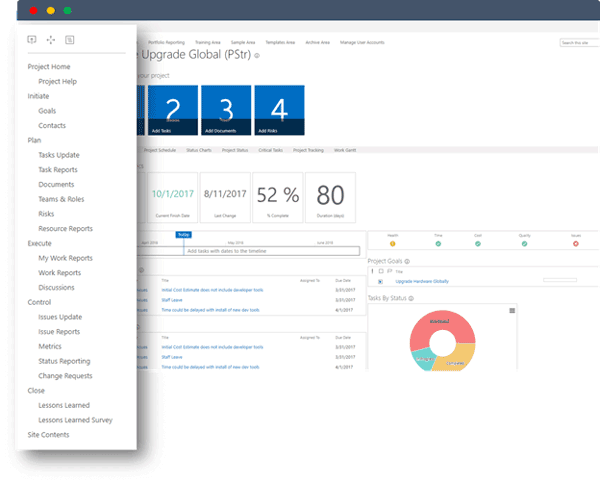
In SharePoint, you can create team sites , which are essentially web pages for teams to collaborate and move work forward. With some simple edits to the Quick Launch, you can map your project management processes to SharePoint site (with as much or as little process as you want – it’s up to you to decide what your team is ready for).
You can add different lists and apps to manage all aspects of your project, including the project statement, project issues, risks, tasks, goals, change requests, project status reports – or any other process you need to manage your project.
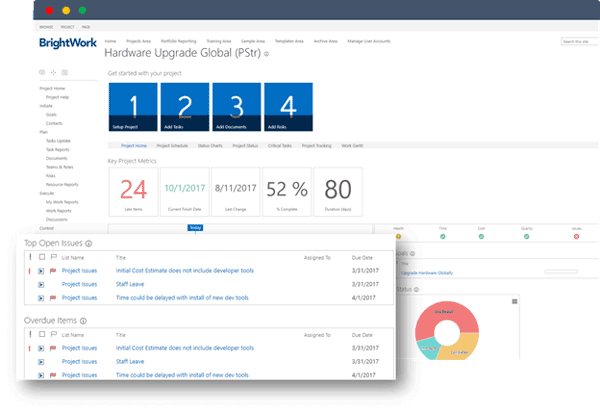
You can even group these links on the Quick Launch so that they map to various project phases. In the screenshots below, you’ll see an example of how this can be done in SharePoint.

You could use this kind of breakdown, or anything that makes sense to you.
The most important part of updating the Quick Launch is that it matches your project management approach. It becomes the set of rail tracks to guide the team through the project and providing a window into the various project reports to keep the project going forward.
2. Manage tasks with work management lists and dashboards
All SharePoint team sites come with a Project Tasks list , where you can build out the project schedule and manage the project plan. Once you have the project planned and responsibilities assigned, you’ll want to create a series of work reports to track all the tasks and work associated with the project.
A few of the most basic reports you should create include:
All Tasks: a view of the Tasks List with no filter, showing the full project plan.
My Tasks: a view of the Tasks List with parameters “assigned to equals me (the logged in user) – giving each team member a place to manage their individual tasks. As team members work on the project and update their tasks, the project manager has a quick view of the progress of the project.
Active tasks: a view of the Tasks List with parameter “status does not equal to completed” – providing the project manager and stakeholders an indication of the work that is still outstanding.
Overdue tasks: a report with the parameters of “status does not equal to completed” and “due date is less than today” – a very handy report for getting a snapshot of tasks that have missed their deadline, so you can make adjustments and keep the project schedule moving.
Finally, you will want to add one of these work reports to the project homepage. We recommend the Active Tasks view – including a Gantt view of the tasks – so everyone involved has a sense of the progress of the project.

3. Create Project Status Reports
It’s really easy to create project status reports and dashboards using a list and workflow in SharePoint.
You can enter project information in a datasheet view, and the workflow will turn that information into a project status dashboard.
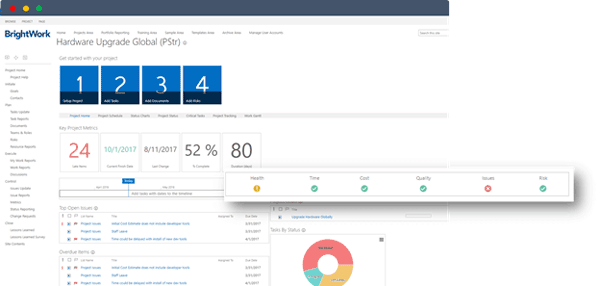
When you “stop editing the list”, the datasheet will be transformed into a project status report with R-A-G status as well as other data such as health, time, cost, comments, percent complete.
You keep a history of these reports to reflect the status of the project at a point in time.

4. Use the Microsoft Project to SharePoint sync
The Tasks List in your SharePoint project site syncs seamlessly with Microsoft Project (Professional Desktop), significantly extending the project management capabilities of both SharePoint and Project.
With this capability, you as the project manager can manage the project schedule in Microsoft Project, and then sync that schedule back to the project site in SharePoint, where the team can access the plan and manage their work using the various work reports and task management views we discussed above.
And it really could not be easier!
In the screenshots below, you can see that the SharePoint to Microsoft Project synchronization is as simple as the click of a button.
- Navigate to the Tasks List and build your initial project plan in the SharePoint site.
- Click “Open with Project”
- Make some changes and calculations in Project, and hit “Save”
- Project will then sync with the Tasks List in SharePoint:
- Task List in SharePoint is updated!
Once you have synchronized the Project Plan to SharePoint, the next time a team member enters the site, all of their work reports and dashboards will be updated with the latest deadlines and progress.
Likewise, they don’t ever have to leave SharePoint to update the status of their work. Simply ticking off a task as complete will mark it done, and that task will also be updated the next time you open the plan in Microsoft Project.

All of this functionality is available with native SharePoint. With a little bit of SharePoint know-how, I’m sure you could get your site set up to do all of the above and get on the road to project management success with SharePoint. And one of my favourite features of SharePoint is the ability to save sites as templates.
So, once you have your project site set up the way you want, save it as a template that you can use over and over again, saving you time and effort, so you can focus on the work that matters: delivering a successful project
But why spend your time building it when we have a Free SharePoint Project Management Template already created – that does all of the above (and more)! The templates is available for SharePoint 2016, 2013 and 2010, and provides a SharePoint site that has been pre-configured to manage a project. It is yours to manage as many projects as you want, for as long as you want, on SharePoint for free.
https://www.brightwork.com/product/free-sharepoint-project-management-templates
